
Making a media playout box with a Raspberry Pi
 So a new challenge.
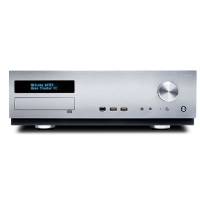
For our church broadcast system (see here) we needed a playout box to play video clips out to the internet (service intro sequence and ending, mainly). You can buy these but they are £500 ish.
A raspberry pi is just the ticket for this sort of thing and you can make a nice player for about £40. The video output will use the main HDMI out so a small LCD display is used to show what the unit is doing.
The unit will play video clips over the network from the church server (Synology NAS box) and will be controlled over the network from the video control system.
Ingredients: 
1 Raspberry Pi model B (the original)
1 PiFace Control And Display board
1 Case for the unit. (Only seems to fit the original Pi B so a good job I had one lying around).
Create a card with the Raspbian Lite OS on it (don't need fancy graphical desktop for this) - using Etcher application to create the card.
NB: Use Raspbian Jessie for this not the latest version, which no longer has the libraries for the Piface display.
Run it up and go into
$ sudo raspi-config
In [Interfacing Options] enable SSL to allow you to login without a keyboard attached. While you are in there you might like to enable the SPI pins so it can talk to the display
While we are in config, we need the pi to login automatically and run the python automatically. In Jessie this is an option Boot options ->Console Autologin.
Find the IP address using
$ ifconfig
Then you can login with Putty or something.
Make sure you are using the lastest version of Raspbian:
$ sudo apt-get update
$ sudo apt-get upgrade
Install omxplayer and dbus
$ sudo apt-get install omxplayer
$ sudo apt-get install dbus
Install software for the PiFace CAD board...-Install pifacecad (for Python 3 and 2) with the following command: (note those are squiggly brackets)
$ sudo apt-get install python{,3}-pifacecad
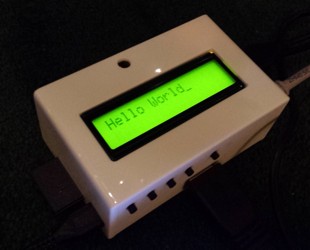
At this point you should be able to write a little python program to talk to the display...
$ nano disptest.py
import pifacecad
cad = pifacecad.PiFaceCAD()    # create PiFace Control and Display object
cad.lcd.backlight_on()         # turns the backlight on
cad.lcd.write("Hello, world!") # writes hello world on to the LCD
Press Ctrl-O to save, Ctrl-X to exit.
Run the program
$ python3 disptest.py
(if you get a message the display is not found, and you have definitely enabled the SPI, see this link: https://github.com/piface/pifacecad/issues/24
You can also read the buttons using
cad.switch_port.value
Hokay, so for the next step we will mount the church NAS drive as a drive on the Pi so that we can access the video files. (see here)
Make a folder that the drive will map to: mkdir sjnserver
Then edit the fstab file to connect the NAS drive. I used the IP address of the drive.
sudo nano /etc/fstab
Add the following line to the bottom of the file (assume nas is the folder on the NAS drive you want to mount)
//192.168.1.xxx/nas /home/pi/sjnserver cifs username=your_username, password=your_password, users, auto,user_xattr 0 0Then mount the drive using
sudo mount -a
If this works then the pi should remember it on power up, and if you do "cd sjnserver" then "ls" the contents of the server folder should be shown.
$ omxplayer videofile.mp4However our end goal is harder than this because we want to control omxplayer from a program, so that the video control software can send "start" and "next track" commands to the player.
For this we will use the omxplayer wrapper by Willprice.
Frist need to install git so we can get it from github
$ sudo apt-get install git
Make a git folder (mkdir git) and cd git, then get it with
$ git clone https://github.com/willprice/python-omxplayer-wrapper.git
also need to install python setuptools
$ sudo apt-get install python-setuptools
then change to the python-omxplayer-wrapper folder and run
$ sudo python setup.py install
Lots of stuff should pass by and the omxplayer wrapper should be installed.
We also need to install dbus
$ sudo apt-get install python-dbus
Then we should be able to do this from python
from omxplayer import OMXPlayer
from time import sleep

file_path_or_url = 'path/to/file.mp4'

# This will start an `omxplayer` process, this might
# fail the first time you run it, currently in the
# process of fixing this though.
player = OMXPlayer(file_path_or_url)

# The player will initially be paused

player.play()
sleep(5)
player.pause()

# Kill the `omxplayer` process gracefully.
player.stop()
player.quit()
It's nice not to have to edit the python on the pi as the editor is a bit 1960's. So using Notepad++ we can do it on the pc - use the NppFTP plugin (click the cog, go to profile settings to setup a SFTP connection to the pi - type hostname -I.on the pi to get its IP address). You also need to enable SFTP on the pi using raspi-config, Interfacing Options. Then every time you save the code on Notepad++ it is automatically ftp'd up to the pi, nice.
We will also need pygame for this which is not included with Jessie lite
$ sudo apt-get install python-pygame
To autorun the script, sudo nano /etc/rc.local and add the lines
cd /home/pi
python player.py
if os.path.ismount('server')==False:

    cad.lcd.set_cursor(0,0)

    cad.lcd.write("Disk not mounted")

    cad.lcd.set_cursor(0,1)

    cad.lcd.write("Stopped")

    sys.exit(0)
The player can fail 2 ways - occasionally it doesn't load properly - it plays the file but there is no python control. In this case we get an exception from the player load command, so we need to kill the player and start it again.
try:

    player=OMXPlayer('server/'+mediafile, args=['--no-osd', '-o', 'hdmi', '-b'])

except Exception as e:  #sometimes the player loads but we can't control it - if so, we get here

    cad.lcd.set_cursor(0,1)

    cad.lcd.write("Player unlinked")

    os.system("killall -9 omxplayer.bin") #kill the player, we will restart it
try:

   x=player.position()

except Exception as e:

   cad.lcd.set_cursor(0,1)

   cad.lcd.write("Can't play file")
We'd like to control playback by UDP packets so that the touchscreen controller can automatically start the clip as it plays (we also want the touchscreen to fade out the live audio while the clip plays).
First for this we will need to set a static IP on the pi. To do this, sudo nano /etc/dhcpcd.conf
Then at the bottom add the lines
interface eth0

static ip_address=192.168.1.25/24

static routers=192.168.1.254

static domain_name_servers=192.168.1.254
(the /24 in the ip address sets the netmask)
Then we need to add UDP support to the python program. As follows:
(to be added...)
Still to do:change the menu button so it doesn't exit to the command line.
And maybe give an option to play from the local SD card.
Attempt to use 2 instances of omxplayer, so you can be preloading the next clip - and cut or fade to the next clip without black or a pause